Uncategorized

The Ultimate Hunting Gear Guide

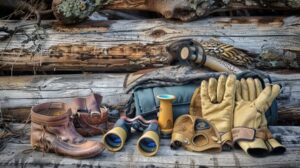
Having the right hunting gear is essential to success. If you’re planning an overnight hunt, consider options like a tent or hammock that can protect from the elements.

Hunting Gear

Pack a mid-layer with synthetic fill or grid fleece to help you regulate your body temperature. The right layers will also ensure comfort. Read on Elk Calls for more information.

A knife is perhaps the most important tool that hunters carry, as it’s used to clean and prepare game. A good hunting knife will retain an edge, as hide and hair are notoriously hard on knives; it should also be strong enough to break bones. Lastly, it must be comfortable in the hand to protect the user from accidental injury.

The blade material of a hunting knife is important, as it will affect the blade’s resilience to corrosion and how easy it is to maintain an edge. Stainless steel is more resistant, while carbon-based metals can be harder to sharpen. The hunting knife’s handle material is another crucial consideration; synthetic materials like G-10 and Micarta are common choices, offering durability and a comfortable grip. Natural materials such as wood and leather can offer a more traditional feel.

Some hunters prefer to carry both a fixed blade and a folding hunting knife, depending on their specific needs. For smaller tasks, such as whittling fire tinder or cleaning an arrow, a quality folding knife stashed in the pocket can be ideal. However, for major field dressing tasks, a fixed-blade knife is preferred.

A hunter can also invest in a hunting knife set, which includes multiple tools to make animal processing easier. These sets often include a caping knife, skinner, boning/fillet knife, butcher knife and bone saw. They can be ideal for the beginner hunter who wants to have all of the tools necessary to process game in one convenient pack.

Snacks

Having the right snacks in your hunting backpack can make the difference between a successful hunt and a wasted trip. The best hunting snacks should be nutritious, lightweight and easy to eat without making any noise. They should also take up little space in your backpack so that you can bring more essential gear.

When hunting, a lot of walking can be involved and it’s important that you keep up your energy levels. Taking some granola bars with you is a great way to do this and these can also be a good source of protein for your trip.

If you want something a bit more filling, try packing some fruit for your hunt. Bananas are a good choice as they can easily fit into your backpack without causing any mess or making too much noise. You could also opt for some dried fruit, like banana chips or even a few fruit leathers, which can be a fun treat that will remind you of your childhood and give you some extra energy for your trip.

Another good option is jerky. It is high in protein and can give you that salty crunch you crave when hunting, and it also has a long shelf life and can be stored easily in your backpack. Another option is trail mix which contains a harmonious blend of carbohydrates, fats and protein to help you stay fueled for your hunt. Just remember to be careful when munching on sunflower seeds, as spitting them on the ground can alert deer and disrupt your hunt.

Water

Getting dehydrated during a hunt is one of the worst things that can happen. Fortunately, most cases where survival techniques are required to procure water can be avoided with careful planning and the right gear. This includes knowing the location of natural water sources and having the equipment needed to clean that water so it is safe for consumption.

A quality water bladder is an essential part of any hunting pack. There are several different types of bladders available in a variety of sizes and materials. Some are even designed to be shatterproof, ensuring you can carry it with confidence on rough terrain. For those that prefer to use a bottle, consider investing in an insulated bottle. These bottles keep your beverage cold or hot for hours, and they are perfect for long days of glassing from windy ridgetops.

A first aid kit is another must-have piece of gear. It should contain a variety of items such as bandages, hand sanitizer and alcohol wipes, pain medication, tourniquets, cordage for splints, etc. Having a first aid kit will allow you to respond quickly in the event of an accident, helping to prevent further damage or injuries and allowing you to return to your campsite faster.

First Aid Kit

A solid first aid kit is one of the most essential pieces of gear for anyone who ventures outdoors. It’s an unsung hero in your backpack, ready to save the day when you get injured on a tough hike or your buddy takes a spill while preparing for that big backcountry hunt.

The backcountry is a dangerous place, even for the most experienced hunters. Rugged landscapes with difficult footing and steep inclines increase the risk of slips, falls and puncture injuries. Add in the cold and the resulting risks for hypothermia increase drastically. The savvy outdoorsman works hard to prevent these issues by ensuring proper nutrition and clothing, staying properly hydrated and planning ahead. But even the most well-planned trip can take a turn for the worse.

When choosing a first aid kit, it’s important to balance size and comprehensiveness. While it’s tempting to pack as much as possible in order to be prepared for every scenario, you can quickly exceed a pack’s weight limit and start to sacrifice some vital items. A good solution is to make sure all your basics are covered and then add in extras like Duct tape, a multitool or a survival blanket for emergencies. These tools can tackle many of the smallest problems on your hunt before they become more serious. From reducing blood flow with a CAT tourniquet to bracing sprained or fractured joints, your first aid kit can be the unsung hero of your hunting trip.

Mobile Phone

Many hunting apparel companies have caught on that hunters love their mobile devices, often outfitting their outer layer jackets with zippered pockets specifically for phones. It’s easy to see why: a phone can be used for safety, selfies, and passing the time while in the stand or scouting for deer. However, smartphones can be so much more than a simple tool for entertaining or work – especially when equipped with apps designed for the outdoors.

The number one must-have app for the modern day hunter is a hunting map or GPS application like OnX Maps. The ability to view satellite images of the area you’re scouting or hunting makes the process far more efficient and productive. This information also helps hunters to find pinch points, water sources, landowner parcels, and more. As a bonus, some advanced hunting maps apps can even help hunters predict the best days to hunt by analyzing weather patterns and comparing previous years’ hunting data.

In addition to this, a thermal camera for a mobile phone can be an invaluable tool for hunters. Providing the ability to spot prey at long distances, these cameras can save time in the field by eliminating the need to walk around and observe deer or other wildlife. They can also be used to record and document encounters with wild animals, providing a greater connection with nature than ever before.

Electrics

A good rangefinder is one of the essential hunting accessories that you must have. It helps you see the target clearly and ensures that your shots are accurate. It also helps you keep a safe distance from the game.

Another important hunting accessory is a camouflage suit or jacket. This will help you blend in with the environment, giving you an advantage over your prey. It can also be helpful in reducing the noise you make, which will help in increasing your chances of a successful hunt.

Lastly, you will want to bring a flashlight or headlamp with you so that you can see in the dark. It will come in handy when you are going after nocturnal animals or during dawn and dusk hunting sessions.

While it’s tempting to pack all sorts of gear that promises a big catch, remember to stick to a carefully curated list. You don’t want to be deep in the wilderness and realize that you forgot a pair of socks or extra ammo!

Always remember to take note of the location of power lines and electrical equipment before you start your expedition. Shooting near these structures can cause damage to the conductor, resulting in power interruptions and serious safety hazards for lineworkers. So, be careful and be observant especially in wooded areas where these structures may be hard to notice.

Uncategorized

Mobile Home Remodeling Costs

A well-executed remodel can breathe new life into a mobile home and increase its value. However, it’s important to understand the costs involved before pursuing a renovation. Contact Mobile Home Remodeling Tacoma WA now!

YouTuber and lifestyle influencer Little Blessed Nest documented her journey to completely remodeling a 1988 single-wide mobile home. From removing the drywall to replacing the flooring, her before and after transformation is jaw-dropping.

A mobile home remodel is a great way to improve the look and feel of your living space. However, like any remodeling project, it requires careful planning to ensure you don’t exceed your budget. It’s also important to consider all the costs of a mobile home renovation, including materials and labor. This will help you determine which projects are feasible and what changes are best for your mobile home.

Generally, mobile home renovation costs are lower than those of site-built homes. This is because mobile homes are smaller and easier to update than traditional homes. In addition, a mobile home remodel can be completed in less time than a conventional one. Moreover, most of the renovations can be done by yourself. However, some projects, such as installing new windows, may require the services of a professional.

The cost of a mobile home renovation can vary significantly depending on the scope and materials used. For example, a kitchen remodel can be more expensive than a bathroom remodel, because of the cost of appliances and cabinetry. Additionally, the type of flooring you choose can affect the overall cost of a mobile home remodel.

Some of the most common mobile home renovations include combining the kitchen with the living room and replacing old carpets with hardwood floors. These changes can be inexpensive and give your mobile home a modern look. Other popular renovations include adding energy-saving appliances and updating the plumbing. These updates can be costly, but they can save you money in the long run by reducing your energy bills.

Another way to cut your mobile home remodeling costs is by focusing on the most important areas of your home first. Start by identifying the areas that need the most work and make a list of all the repairs you want to make. Then, prioritize these items by order of importance. For example, you should start by addressing any structural issues and then move on to cosmetic upgrades.

Another way to save on a mobile home remodel is by shopping around for the best deals on materials. Many builders and suppliers offer discounts in slow times, so it’s worth checking out these offers. You can also try finding out if local hardware stores have sales on supplies and tools you need.

Materials

When it comes to Mobile Home Remodeling, the type of materials you choose can make a huge difference. High-quality materials can make your renovations last longer, and can also add to the overall value of your home. In addition, using the right materials can reduce the risk of future repairs and maintenance costs.

When remodeling a mobile home, it is important to use materials that are compatible with the home’s frame. Some contractors use materials that are not designed for mobile homes, which can result in problems such as warping and moisture damage. In addition, it is important to consider the age of your home and the scope of the project when choosing materials.

Some of the most popular materials for Mobile Home Remodeling include vinyl siding, wood flooring, and hardwood cabinets. Vinyl siding is a great option for mobile homes because it is durable and easy to clean. It is also available in a variety of colors and styles, making it a versatile option for any remodeling project.

One of the easiest ways to upgrade a mobile home is by replacing the entryway door with a new one that is made from a different material or color. This simple update can transform the look of your home, and can also provide an improved security feature. In addition, it is a good idea to invest in new lighting for the entryway, as this will help ensure that your home is well-lit when you are returning at night.

Replacing your den with new furniture is another way to upgrade your mobile home. Having a comfortable place to relax and watch TV or play video games will add to the appeal of your home. You can find den furniture that is designed for mobile homes, including furniture with built-in storage and shelves. If you want to make your den even more cozy, you can install a fireplace to create a warm and inviting space.

Once you have completed your Mobile Home Remodeling, it is important to perform routine maintenance. This can prevent small problems from becoming major repairs in the future. For example, regularly checking your plumbing and electrical systems will help to keep your home in good condition. In addition, routine cleaning can keep your floors, walls, and fixtures looking their best.

Design

Mobile home remodeling is a popular project that offers homeowners the opportunity to customize their living spaces. Whether the goal is to create more storage space or update the exterior, there are many ways to enhance a mobile home’s appearance and functionality. However, it’s important to consider your budget and the cost of materials before embarking on a mobile home remodel.

Adding a fresh coat of paint to your home’s interior is an easy way to boost its curb appeal and give it a clean, new look. It is recommended to use high-quality paints that are specifically designed for mobile homes. These paints are less likely to crack or peel and will withstand harsh weather conditions. In addition, a coat of fresh paint can improve the home’s energy efficiency by reducing solar heat absorption.

Another easy way to make a significant impact on your mobile home’s design is by replacing doors. Changing the original doors to barn or sliding glass doors can make your home look more modern and add a great deal of visual appeal to the entrances of the house. These changes also allow in more light and help to increase your home’s security.

A mobile home’s exterior can be upgraded with new doors, windows, and vinyl siding. These upgrades can be a big step towards improving the appearance of your mobile home and increasing its value. You can choose from a variety of styles and colors to suit your taste and needs. It is important to hire an experienced contractor to ensure the installation goes smoothly.

Many people choose to remodel their mobile homes because they are outdated and no longer meet their needs. For example, a family may want to expand their kitchen to accommodate a growing family or they may have outgrown the existing layout. Remodeling a mobile home can be an affordable way to create the perfect home for your family.

Mobile home remodeling is a good investment, but it’s important to plan your project carefully. It is also a good idea to consult with your neighbors and community before starting your renovations. This will help you determine if your plans are compatible with the neighborhood’s requirements. In addition, you should consult with a reputable contractor who has experience working on mobile homes.

Contractors

Mobile Home Remodeling involves a mix of both design and construction. It is important to balance your vision and budget and consider the scope of the project. Smaller remodels may be able to bring fresh new style without a large price tag, while major renovations will require more of a financial commitment. It is also crucial to be prepared for unexpected expenses.

If you are thinking about remodeling your mobile home, it is essential to find a reputable contractor. Mobile homes are often built in a specific way and require contractors who have experience with mobile home construction. This will ensure that the job is done correctly and will not cost you extra money in repairs down the road.

You should always get estimates from multiple contractors before hiring someone to work on your mobile home. When you do, ask the contractors for references from previous customers. You should also look up the contractors on your state licensing board and BBB website to see if they have any complaints. If a contractor doesn’t provide you with references, it is best not to hire them.

Remodeling an old mobile home can be a challenge, but it can also be rewarding. It is a great way to make your home more modern and livable. Some of the most common renovations are kitchens and bathrooms. However, it is important to keep in mind that changing the layout of a bathroom could cause plumbing pipes to change position.

Another popular mobile home remodeling project is installing a deck. This can give your home a modern look and increase its value for resale. In addition, it is a good idea to install energy-efficient upgrades such as new doors and windows and insulated skirting to reduce your utility bills.

Adding a deck to your mobile home is an excellent way to increase its curb appeal and make it more livable. In addition to being a great place to entertain, it can also provide you with a great view of your property.

It is important to choose a deck material that will stand up to the elements and withstand frequent use. For example, cedar decking is a durable material that will last for many years and can be stained to match any color scheme.

Lawyer

A Birth Injury Lawyer Can Help Families Recover Damages

A birth injury lawyer can help families recover compensation for medical expenses, lost wages, and other costs associated with a child’s disability. A successful claim can also include damages for emotional distress, pain and suffering, and other noneconomic losses.

Lawyer

Atlanta Birth Injury Lawyer knows how to counter the pressure tactics insurers use to reduce or deny a settlement. He or she can also prepare for trial, if necessary.

Parents of newborns must be vigilant when observing their children’s physical and behavioral development. It is especially important to note any unusual signs or behaviors that could indicate birth injuries.

For example, a baby’s abnormally arched back while crying or one or both hands that appear to be curled in claw-like shapes may be warning signs of severe injury. Other red flags can include a lack of responsiveness to intense stimuli, a lack of coordination or involuntary movement (such as a flailing arm), poor muscle tone, or a weak or limp gait.

If a doctor fails to take action after noticing any of these symptoms, the result can be a serious or fatal birth injury such as cerebral palsy, spinal cord injury, and brain damage. These injuries often cause lifelong complications and require extensive therapy, medical treatment, and other services. This can cost families enormous amounts of money that they do not have.

Many of these injuries are preventable, however, if proper care is provided during pregnancy, labor and delivery. If you think your child suffered a birth injury due to a medical error, a birth injury lawyer can review the case and determine if you are eligible for compensation.

Thon Beck Vanni Callahan & Powell can help injured families pursue financial compensation from the hospital and doctors responsible for their children’s injuries. To prove liability, our firm must establish that a medical professional breached the applicable standard of care. This requires establishing the existence of a doctor/patient relationship, identifying a doctor who breached this duty, and showing how this breach caused the injury and damages.

Our experienced lawyers have extensive knowledge of the medical standards and criteria for proving negligence. They also have years of experience in helping injured clients pursue claims against healthcare providers. They understand the tactics defense attorneys use to refute allegations of medical malpractice and will fight to secure the maximum compensation for your family. Whether you need financial compensation to pay for your child’s ongoing medical treatment or to cover loss of income due to permanent disability, our firm can help.

Causes of Birth Injuries

Injuries that result from birthing errors are largely preventable. The medical professionals who are responsible for a mother’s health and the safety of her unborn child must uphold high standards of care to avoid complications. When those standards aren’t met, both the mother and the baby may suffer irreparable harm. A birth injury lawyer can help families recover the resources needed to pay for long-term care and compensation for their losses.

A birth injury lawsuit can be complicated, and you will need to prove that a doctor breached his or her professional duty during your child’s delivery. To do so, you must collect evidence such as medical records and hospital bills. You must also prove that the breach directly led to your child’s injuries. A skilled birth injury attorney will know where to look for this evidence, and how to connect it to the damages you are seeking.

While most physical birth injuries are temporary, some cause permanent disabilities that limit a child’s quality of life. These can include developmental problems like ADHD and autism, as well as physical issues like cerebral palsy, limb deformities, and spinal cord injuries. Often, these conditions don’t appear until later in a child’s childhood or adulthood, when parents are trying to obtain funding for the necessary treatment and services.

One of the most common causes of birth injuries is shoulder dystocia, a condition that occurs when an infant’s head delivers but the shoulders get stuck in the birth canal. This can lead to oxygen deprivation, breakage of the clavicle (collarbone), and other serious injuries. It is also the most common cause of Erb’s palsy and brachial plexus injuries, which can affect a child’s arms and hands.

Other types of birth injuries can include intracranial hemorrhage, brain damage, and stroke. These can be caused by a variety of factors, including excessive force during labor and delivery, infection in the womb, and genetic predisposition.

A skilled birth injury attorney can identify the factors that contributed to your child’s injuries and hold all responsible parties accountable for their actions. Most birth trauma lawyers work at national law firms that handle cases across the country, and they are familiar with local statutes of limitations so they can file your claim in a timely manner.

Symptoms of Birth Injuries

Childbirth should be a joyful experience, but it’s not uncommon for medical errors to occur that result in permanent, life-changing injuries. These are preventable and should never happen, which is why we fight for the victims of birth injury negligence. A successful claim can help injured families recover damages that reflect the full cost of care for their children throughout their lives.

The first step is to establish that a doctor-patient relationship existed before the injury occurred, which can often be done with hospital bills and medical records. Once this is accomplished, an attorney can identify and collect evidence that the doctor breached their duty of care and that this breach caused your child’s injury. This can include hiring expert witnesses who review the case and provide a formal opinion as to whether malpractice occurred.

Typically, birth injury claims involve damages for the future costs of medical treatment. These can be expensive, especially if your child requires extensive therapy or special equipment for their condition. A qualified birth injury lawyer can work closely with rehabilitation nurses and doctors to develop a treatment plan for your child and accurately value their lifetime of needs.

Once a diagnosis is made, your attorney can contact the medical providers involved in your child’s injury and their malpractice insurers to notify them of the claim. They can then negotiate with the insurance company to try to settle your case. A knowledgeable lawyer can recognize the pressure tactics used by insurers to minimize settlements and ensure that your claim adequately reflects all of your losses.

If a settlement cannot be reached, your lawyer can file a lawsuit against the at-fault medical providers in court. They can present the evidence in a way that persuades a jury of your child’s birth injury and obtain compensation that accurately reflects your damages. This includes economic damages for the future costs of treatment and noneconomic damages for your child’s pain and suffering.

Compensation for Birth Injuries

The birth of a child is a joyful occasion, but medical mistakes can turn it into a frightening ordeal. If you believe that your child’s injury was caused by a negligent act or omission by a healthcare provider, we can help you seek justice. A successful lawsuit can allow you to recover compensation for the current and future costs of treatment, your child’s pain and suffering, loss of quality of life, and other damages.

The first step is to determine whether the medical professionals involved acted in accordance with the generally accepted standard of care. This is often done by bringing in medical experts to review the case. The experts will review the medical records and provide their opinion as to whether the doctor acted within the scope of what other medical professionals in his or her specialty would have done under similar circumstances.

Once our attorneys have all the evidence, they will file the lawsuit. You will become the plaintiff, and the doctors and hospital that were allegedly responsible for your child’s injuries will become the defendants. The court will assign a case number and schedule for the litigation, which may include mediation or other pretrial procedures.

Most cases settle out of court, but if the medical providers do not agree to a settlement offer, your lawyer will take them to trial. Medical malpractice trials can be complex, time-consuming, and costly. Your attorney’s experience in these cases can help to shorten the trial process and increase your chances of winning a fair and favorable settlement.

A high-quality birth injury attorney can make a significant difference in the outcome of your claim. An experienced attorney can protect your rights and negotiate for a higher settlement than you could obtain on your own. Ultimately, you and your child deserve to receive full compensation for the damage that a birth injury can cause. Even though a successful legal victory cannot undo what was done to your family, it can give you peace of mind that you and your child have the resources you need to live a happy, healthy, and fulfilled life.

Garage Services

The Evolution of the Garage Door

Invented when the Ford Model T was taking off in popularity, garage doors let owners shelter their cars without putting them at risk of rain or snow. The doors also kept odiferous horse-drawn carriages away from the cars.

Garage Door

To keep your Patriot Garage Door working its best, lubricate torsion springs twice a year with lightweight motor oil. Lubricate rollers and tracks, but not hinges or spring wires, which can rust.

The garage door has gone from a simple structure to one of the most high-tech components in our homes. It’s fascinating to see the evolution of this invention, which started as a simple solution to a very common problem.

With the introduction of cars in the early 1900s, it became evident that people needed a place to keep them. Initially, garages were repurposed carriage houses or barn-like structures with doors that swung outward. Eventually, as cars became more popular, these structures became too small to accommodate the growing number of vehicles. Luckily, in 1921, C.G. Johnson of Hartford City, Indiana, came up with a better solution. He invented the first overhead garage door, which folded while lifting up, running parallel to the garage ceiling. This was a huge improvement over the old doors, and it also made storing the car much easier.

In 1926, Johnson followed up with another revolutionary invention: the electric door opener. This allowed people to open and close their garage doors remotely, which was a major convenience. This further evolved the garage door industry, allowing companies like Overhead Door Corporation to flourish.

Today, we use garage doors in a variety of ways, from storing our vehicles to serving as an extension of our home. In fact, some of the biggest names in business got their start in a garage, including Harley Davidson, Disney, Apple, and Mattel.

Despite all the innovations, there have been some unfortunate incidents that highlight the need for additional safety features in residential garages. In 1993, a Minnesota man was crushed to death by his own garage door, which did not have photoelectric or pressure-sensitive sensors. This tragedy led to the Consumer Product Safety Commission in the U.S. requiring that all residential garage doors have both photoelectric and pressure-sensitive sensors.

In addition to sensor technology, modern garage doors are also equipped with a host of other safety features, including a backup battery in case of power failure, a manual release mechanism, and tamper-resistant bottom brackets. They are also built to withstand extreme weather conditions, including snow and high winds.

Materials

There are a few types of garage door materials to choose from, each one with their own pros and cons. Steel garage doors are the most popular because of their durability and affordability. They also offer a variety of customization options like windows and panel designs. Wood doors are more expensive but provide a natural look that complements your home’s architecture. Aluminum garage doors are lightweight and corrosion resistant. They also have a modern aesthetic, but they may require more maintenance and repairs than other materials.

Vinyl is another affordable option that requires little upkeep, but it’s best suited for homes in temperate climates since it can crack and warp under harsh conditions. Fiberglass is a durable material that resists dents, but it can oxidize over time. It also has low insulation capabilities. Steel and fiberglass are both great choices for homeowners looking for a high-quality, cost-efficient garage door.

Vertical Track

A metal section welded, bolted or riveted to the jambs that guides and supports the vertical movement of the garage door. It also contains a horizontal track with a curved end known as the radius.

Hinges Located on the ends and centre stiles at the meeting rails, hinges allow the sections to “break” or pivot independent of each other as they are opened or closed. They are essential to the proper operation of the garage door.

Struts A u-shaped reinforcement hardware that attaches to the inside of the door and runs the length of the span of the section to add strength and rigidity. Wide garage doors require struts to help prevent buckling and sagging in the horizontal position and increase wind load capacity.

A residential garage door is a major investment that protects your belongings and provides convenient access to your home. The type of material your door is made from can impact its durability, lifespan and overall cost. It’s important to consider your priorities, budget and local weather conditions when choosing a garage door material. A well-made, low-maintenance door will save you money on repair and maintenance costs over the years.

Styles

Traditionally, garage doors were made of solid panels that hung and hinged together to open and close. But as cars took over from horses, and people wanted a more convenient way to access their cars than driving out and parking on the street, they began to turn to a new method of opening their garages: overhead operation. These garage doors operate from above and swing up into a horizontal position, similar to the style of commercial-type galvanized steel roller shutters.

A wide variety of garage door styles are now available to match house designs and personal aesthetics. From classic carriage house-style products to sleek, full-view aluminum door styles, these modern options work as either a bold statement piece or to blend into the exterior of your home and let in more light.

Single panel and sectional doors make up the majority of garage doors sold today. These products consist of four or five horizontal sections joined together with hinges and can be bent to conform to curved facades like gables and dormers. They also allow for more customization with window patterns and cladding, including wood tones or natural-looking faux wood composite overlays.

Carriage house-style garage doors are extremely popular for farmhouse-style homes. They recreate the rustic appearance of old-fashioned barn doors and can be customized with painted or stained buck overlays and divided window grilles. These doors pair well with other classic exteriors, including Colonial and ranch homes.

Tudor and Craftsman-style homes feature decorative half-timbering and stucco exteriors. Wood-panel garage doors with A- or V-bucks complement these classic styles. They’re also suitable for Craftsman houses, which often have a mix of stone and brick exterior materials on their lower portions.

Victorian-style homes have asymmetrical facades and may feature porches, dormers, or cutaway bay windows. These eye-catching structures are often two to three stories tall and come in a variety of jewel tones. They may be accented with decorative hardware and wrought iron.

Louver-style garage doors have horizontal slats to bring in natural light and air. They’re a great fit for colonial and coastal homes, and they can be made from real or faux wood to achieve more authenticity. They pair well with modern homes as well, especially those that have a minimalist design and use natural colors for their exteriors.

Installation

There are many different factors that will influence the cost of your garage door. The most significant is the type of material that you want to use, as some materials are more expensive than others. Another factor is how much customization you want in your door. For example, if you want windows, patterns or decorative hardware, this will increase the price significantly. Finally, the size of your garage and any potential resizing will also impact costs.

Springs: The springs are one of the most important components in a garage door system as they enable it to open and close smoothly. They are attached to cables at the bottom corners of your garage door, and they wind up and store energy as the door closes, helping it lift. During installation, the springs are under high tension and can be dangerous to handle, so this job should be left to professionals.

Cables: These are braided steel wires that work alongside the springs to help the door move up and down. They are available in varying thicknesses to support a variety of doors. To install them, first lay the bottom panel exterior-side down on a workbench or sawhorses, and then slide the track rollers into the holes in the brackets at the top corners of the panel. Finally, secure the track rollers to the header with lag screws.

Doorset: The doors themselves can be made from wood, fiberglass or vinyl, and they come in a wide range of sizes and styles. For example, you can get a traditional single-panel door that swings up overhead on hinges, or you can opt for a sectional door that folds horizontally. In addition to the style of the door, you can also choose a color and finish.

Insulation: Some garage doors are insulated to reduce noise and heat transfer between the exterior and interior of your home. This is a great way to save money and protect your home’s value.

Jackshaft operator: Designed to work on rolling grilles, doors and shutters, jackshaft operators are a good choice for large garages as they won’t obstruct headroom. They are available in light, medium and heavy models to suit a range of applications.

Home Improvement

Cabinet Refinishing – A Cost-Effective Way to Refresh Your Kitchen

Cabinet Refinishing San Jose CA is a surface-only refurbishment that keeps your cabinets in place and revitalizes them with new paint or stain. This method saves money and time compared to refacing or replacing the cabinet doors.

Cabinet Refinishing

Most store-bought paints don’t last long on cabinets because the natural oils in your hands break them down over time. Stains, on the other hand, penetrate deep into your wood’s grain and highlight its beauty.

Cabinet refinishing is considerably less expensive than replacing cabinets. The cost can be as little as $2,000, making it a cost-effective way to refresh your kitchen without breaking the bank. If you decide to hire a contractor for this project, make sure they have experience in the field and can provide references from past clients. It’s also important to compare multiple quotes before hiring someone.

Depending on the quality of your cabinets, you may only need to have them refinished rather than replaced entirely. This is ideal if your existing cabinets are structurally sound and only have cosmetic issues like scratches or faded colors. Cabinet refinishing is best for solid wood cabinets, as this material can hold up well to procedures like cleaning, scrubbing, and minor repairs. However, it is not suitable for lacquer or wood veneer cabinets.

When choosing a contractor for your refinishing project, be sure to ask them questions about their background and previous experience with cabinet projects. This will help you determine whether they are a good fit for your project and can offer the results you need. You should also be sure to choose a contractor who uses high-quality finishes and offers a warranty on their work.

Homeowners spend a lot of money on different renovation projects to increase their property value and give their home an overall better look. Many of these include indoor space renovation and remodeling, and one of the most popular is cabinet refinishing. The process of refinishing your cabinets can add a substantial amount of value to your home and is definitely something that you should consider.

It’s also important to keep in mind that keeping your current cabinets instead of replacing them means you are using less materials and reducing waste. This helps prevent unused or unwanted materials from clogging up landfills and gives your cabinets a new life that they may not have otherwise had. Refinishing your cabinets is a great way to save money and get the look you want for your kitchen without spending too much. This is especially true if your cabinets are in good condition but just need a facelift.

Time-Saving

Cabinet refinishing is much less time-consuming than replacing your cabinets. Replacing cabinets requires extensive construction work that can take days to complete, while refinishing only involves working with your existing structure and applying a new coat of paint or stain. It’s also significantly cheaper than replacing your entire cabinet frame, especially if you need to replace a door or drawer front.

To prepare your cabinet doors for refinishing, begin by removing all hardware and laying down drop cloths to protect surfaces you don’t want to get painted or stained. Once your workspace is prepped, begin by cleaning the surface to remove grease and dirt from the wood. Next, lightly sand the cabinets to create a smooth surface for your new finish. Finally, apply a primer designed for your type of material and let dry before you begin painting or staining.

Choosing the right products and tools is key to a successful refinishing project. A good primer can help the new finish adhere and last longer, while high-quality paints and stains will provide an attractive and durable finish that stands up to everyday wear and tear. In addition, it’s important to choose a water-based paint or stain rather than a solvent-based product that produces toxic fumes and odors.

While a DIY refinishing project is possible for many homeowners, it’s often best to leave this type of job to a professional. A trained, experienced painters can help ensure that the job is done correctly and quickly, which can make all the difference in the final outcome. In addition, a professional will have access to tools and products that aren’t always available to the average homeowner, like Restor-A-Finish and Howard Feed-N-Wax, which can significantly revitalize and revive your cabinets without stripping them.

Cabinet refinishing is the perfect solution for homeowners that want to give their cabinets a facelift without spending a fortune on replacements. Whether your cabinets have minor scratches, dents, or faded color, refinishing can hide them and give the room a fresh, updated look. But remember, refinishing is only a cosmetic improvement and won’t fix structural or functional issues with your cabinets. If your cabinet frames are damaged or sagging, it’s best to consider cabinet refacing instead.

Better Appearance

Cabinet refinishing gives your kitchen a major facelift. When refinishing cabinets, you can get rid of chipping paint, cracks, or even dents. The process involves sanding the surface of the cabinet doors and applying new stain or paint. The result is a brand-new look that makes your kitchen stand out from the rest of the home.

In addition to improving the look of your kitchen, refinishing is also an environmentally friendly choice. The process requires less materials than replacing the entire cabinet system, so you’re reducing waste. Plus, the new stain or paint will protect your cabinets from scratches and stains for a longer period of time, meaning they’ll last much longer than before.

It’s important to note, however, that refinishing is a surface-level update and won’t change the style or material of your cabinets. If you want to transform the look of your cabinets, consider refacing instead.

Refacing can be done with a variety of styles, including modern, rustic, and contemporary. It’s a great option for those looking to completely change the look of their kitchen without spending a fortune.

Both refacing and refinishing can help you get the kitchen of your dreams, but it’s important to decide which one is right for you. Refacing will cost more than refinishing, but it’s worth the investment if you’re looking for a dramatic change. It’s also better suited for those with a tight budget than refinishing, which is more of a cosmetic update.

If you’re thinking about getting your cabinets refinished in Cedar Rapids, it’s important to keep in mind that the cabinet doors and boxes must be made of wood or MDF to qualify for refinishing. Thermofoil and laminate won’t work, as they aren’t porous enough to accept paint or stain. Refinishing can be a great option if you have a beautiful kitchen, but need a little bit of an improvement to make it perfect. Be sure to check out our blog for more tips and tricks on how to make your home improvement projects go smoothly!

Longer Life

Cabinet refinishing can increase the lifespan of your cabinets by protecting them from damage. Using high-quality paint and stain will ensure that the finish is durable and resistant to scratches, fading, and other common issues. A professional painter can help you choose a stain that will resist the elements in your environment, and they can also recommend a paint that will be less likely to get scratched or fade over time. This will keep your cabinets looking beautiful for a longer period of time, and it will save you from having to replace them later.

Aside from protecting the cabinets from damage, refinishing can also prolong their life by making them stronger. This will make them more resilient to environmental challenges like high humidity, resulting in a longer lasting and more appealing look. This is why many homeowners prefer to invest in this renovation step as opposed to replacing their cabinets, which could cost more and take longer to complete.

Refinishing is more eco-friendly than refacing because it requires less materials. Refacing is more invasive and extensive because it requires the removal of all the cabinet doors, hinges, and handles, as well as sanding down the entire interior of the cabinets. This is a lot of waste and energy to produce, which is why refinishing is more environmentally sustainable.

Refinishing is also safer for you and your family because it avoids the use of toxic solvent-based finishes that produce foul-smelling fumes. These chemicals are dangerous to breathe, especially in confined spaces like kitchens and bathrooms, where they can linger for weeks. This makes cabinet refinishing safer for everyone in your home, including pets and small children.

Uncategorized

Things to Keep in Mind When Doing Insulation Removal

If you need to remove old insulation to add more, remember these to keep: prioritize safety.

Cellulose insulation is only a DIY project if you know the process and have the right equipment. It is best to leave this project to professionals. Contact Perth Insulation Removal now!

Insulation is a crucial component of a home’s structural integrity, energy efficiency, and indoor air quality. Over time, however, insulation might become compromised due to moisture or rodent infestation, necessitating its removal and replacement. Properly removing and cleaning attic insulation is vital for proper home maintenance and setting the stage for new installation.

While DIY insulation removal is a viable option for homeowners, it’s important to understand that this project requires extensive preparation and safety precautions. This project involves working in tight spaces and dealing with potentially hazardous materials, making it a challenging task for those without prior DIY experience. Additionally, insulation removal is a messy job that requires thorough cleanup and can cause damage to attic structures and the surrounding space if not completed properly.

To prepare for this project, it’s essential to first determine your insulation type and the equipment required to remove it. Different types of insulation require different tools and disposal methods; for example, blown-in cellulose may necessitate a specialized vacuum while batts can be rolled up and bagged. Knowing your insulation type will allow you to plan and execute the removal process effectively, saving time and effort while ensuring the safe disposal of all insulation materials.

It’s also a good idea to clear the attic space and move any items you normally store in the attic downstair. This will help prevent trips and falls and make it easier to relocate insulation bags for disposal. Additionally, it’s a good idea to position waste bags near the attic entrance so you can easily transfer them during the removal process.

The next step is to ensure that the work area is sealed off from the rest of the house. This will minimize dust spread and contamination throughout the living space and will help to keep you and your family healthy during the insulation removal process. It’s a good idea to use heavy-duty plastic sheeting and adhesive zipper doors to protect the attic and prevent leaks.

It’s also a good idea to turn off the power to any junction boxes or light fixtures in the attic before beginning insulation removal. This will eliminate the risk of accidental contact with live wires, which can pose a significant electrical hazard and lead to fire or electrical shock. Lastly, it’s important to make sure that you’re wearing appropriate personal protective gear such as gloves, masks, and goggles to avoid exposure to insulation fibers, dust, and potential allergens and irritants.

Safety First

Insulation removal is a dangerous project and should only be performed by trained professionals. If not done properly, it can lead to health hazards, environmental issues, and structural problems. In addition, it is vital to follow proper safety protocols during the process and to wear appropriate personal protective equipment. This includes goggles to protect the eyes from debris, gloves to prevent skin contact, and a mask to reduce the amount of airborne contaminants that are inhaled. It is also important to keep the work area contained and sealed as much as possible to prevent the spread of debris, dust, and other contaminants throughout the rest of the building.

Before the insulation is removed, it’s a good idea to perform a thorough inspection of the space to assess any damage and structural problems that need to be addressed. For example, old and moldy insulation can be a serious risk to the structure of your home as it can lead to moisture and structural damage. It can also provide breeding sites for pests, which can further degrade the quality of your home’s insulation and cause serious health concerns.

To prepare for the insulation removal process, make sure to clear out any furniture or other items in the attic space and cover floors and walls to prevent contamination and damage. It’s also a good idea to clear the attic access door and to ensure that there is an accessible path from the attic entry point to the attic exit. In addition, it’s a good idea to take measures to protect your roof and any vents or ducts that may be in the area.

Once the insulation is removed, it’s advisable to thoroughly clean and vacuum the entire area, especially if contaminated or damp. This will help to ensure that the contaminated materials are removed completely and that your home is ready for fresh, new insulation.

Equipment

Having the right equipment and supplies on hand will ensure that the insulation removal process is performed efficiently. This includes safety gear such as gloves, a dust mask or respirator, goggles to protect the eyes from loose particles, and lighting equipment for working in dimly lit spaces. It’s also important to have a sturdy ladder for reaching high spaces and a powerful insulation vacuum. This will help to speed up the process and make cleanup easier by sucking up materials rather than sweeping them away. Finally, a tarp to place the used insulation bags on is essential for keeping debris and toxins off of floors and surfaces.

It’s important to assess the size of the attic space and type of insulation before deciding whether or not to undertake the project yourself. If the work involves complex procedures or if there are potential risks, hiring professional assistance may be the best option. For simple tasks, however, DIY insulation removal is often an affordable and rewarding option.

The most common type of insulation in residential buildings is cellulose, which comes in rolls or pre-cut panels and is often stapled to rafters. Its low density means that it doesn’t pose the same health risks as fiberglass, but it can still irritate skin and eyes and release airborne toxins if handled improperly.

Fiberglass batts are typically laid between attic floor joists and can be a bit more challenging to remove because of its clinging properties. It is possible to tackle this task on your own, but it’s important to wear protective gear and follow the proper techniques to minimize dust and irritants.

The preferred method of removing blown in insulation is to use a special machine that sucks the material up into the attic and outside the structure. This will eliminate the need to rake or sweep the space and can save time and money. To perform this type of removal, you’ll need a gas-powered insulation vacuum with at least 150 feet of hose to reach the attic and the exterior eaves of the home. This equipment can be rented from many hardware stores, although it is likely more cost-effective to purchase the equipment if you will be doing the job regularly.

Disposal

Insulation is a hazardous material, which makes it difficult to dispose of. However, with proper preparation and the right equipment, the process can be relatively easy. The first step is to identify the type of insulation in order to determine if it can be recycled or must be considered hazardous waste. Once this is done, the insulation can be placed in containers or bags and transported to a disposal facility.

Some types of insulation, such as cellulose, can be repurposed after it’s been blown out and is in good condition. However, many people don’t have the time or equipment to take on such a demanding project themselves, especially when it comes to dealing with household hazardous waste. In these cases, a professional disposal service is often necessary.

The professionals who perform this task will assess the current condition of the insulation and ensure that the material is free of contaminants, such as asbestos or mold. In addition, the professionals will follow strict health and safety protocols to protect themselves and your home from potentially hazardous particles. They can also help you choose a high-quality replacement that will improve your home’s energy efficiency and comfort levels.

In addition to protecting themselves, professionals who work on this type of project will take measures to contain the insulation and prevent it from leaking into other areas of the house. They may also be able to assist with pest control by eliminating rodent nesting grounds, as well as help you choose new materials that will keep your home comfortable year-round.

Insulation removal can be a complex and challenging project, but it’s important to get it done correctly. When you take the time to prepare properly, work safely, and hire a professional disposal company, it’s possible to remove old insulation and replace it with fresh, clean materials without much hassle. In the end, the results will be worth it — a more comfortable home and reduced energy costs. In fact, it’s possible to save up to 25% of your energy costs with proper insulation! The ENERGY STAR® insulation rebate helps to make the cost of installation more affordable.

Uncategorized

How to Save Money on AC Repair

Air conditioning units need regular maintenance to function properly. Repairing a malfunctioning AC unit can be costly. There are several factors that influence the total cost of a repair.

AC Repair

First, homeowners should try to troubleshoot at home before contacting a professional. Some AC Repair issues can be easily resolved with at-home solutions, such as changing or cleaning the air filter. 

Air filters are one of those out-of-sight, out-of-mind home maintenance tasks that you may not give much thought to unless something goes wrong. But changing an air filter regularly can improve indoor air quality, extend the life of your AC unit, and prevent unnecessary strain on your system.

Essentially, an air filter is designed to trap dust, debris, and other contaminants before they can reach the inside of your HVAC system. This is important because contaminants like mold spores and dust can cause a number of problems that affect both the efficiency and lifespan of your equipment.

Dirty filters can also reduce indoor air quality, which isn’t good for anyone’s health. Worse air quality can exacerbate respiratory issues and even trigger asthma attacks. And a dirty filter will force your system to work harder to cool the building, which will increase energy usage and eventually raise your utility bills.

Depending on the filter type and your living situation, you should clean or replace your air filter once every three to six months. When replacing the filter, make sure you place it correctly. Carefully insert the new filter into its housing, ensuring that it is facing in the direction of airflow as indicated by an arrow printed on the filter. It’s also a good idea to consider upgrading the filter type, as there are options on the market that can work more effectively than your standard model.

Ultimately, a dirty air filter is one of the most common causes of AC failure. Not only does it cause the system to work harder than it should, but it can exacerbate minor mechanical issues and cause the system to break down entirely. In some cases, this can even lead to low refrigerant levels, which will require a professional AC repair or replacement. So be sure to check and change your air filter at least once a month, and don’t forget to invest in a high-efficiency model if possible. This will save you money and prevent unnecessary stress on your AC unit.

Condenser Coil

The condenser coil is an essential component of the air conditioning process. It is located in the outside unit and is responsible for releasing heat absorbed by refrigerant during its cycle of cooling your home. The coil releases the heat by converting it back to its liquid form and releasing it outdoors. This allows the refrigerant to complete its cycle of cooling your home.

A dirty condenser coil can reduce the efficiency of your AC system by up to 30 percent. As a result, it can cause your energy bills to spike and can lead to a premature breakdown of the AC system. Regularly cleaning your air conditioner coils can prevent this from happening and will help your system to operate at its best.

If you’re looking to do a DIY AC coil cleaning, turn off the power to the unit and remove any debris from the surrounding area. Then, spray a non-toxic AC cleaner onto the coil surface and scrub it using a soft-bristled brush. After scrubbing, rinse the coil with clean water. If you notice any signs of heavy dirt buildup, call an HVAC professional. A professional has the right tools and equipment to thoroughly clean your coil without damaging it in the process.

Another way to prevent a dirty condenser coil is to make sure the unit has adequate clearance. Maintain a distance of at least 2-3 feet from bushes, shrubs, vines, or any other plants that may interfere with airflow around the coil. This will help to prevent plant debris, stray baseballs, or soccer balls from blocking the fins and restricting airflow.

Finally, be sure to schedule regular AC maintenance to clean the coil and ensure that it drains correctly. A professional will have the knowledge and equipment to perform a thorough cleaning, including flushing the system’s refrigerant. This will help to ensure optimal performance and longevity of the system.

Blower

The blower motor is responsible for pushing heated or cooled air through your dashboard vents based on the settings you choose on your climate system. It is a mechanical and electrical device, meaning it is prone to all sorts of faults that can impact cabin comfort. If you notice any signs that your blower motor is going bad, it’s a good idea to have professional HVAC service come out to assess the situation.

Strange noises, like squealing or screeching sounds coming from your blower fan may indicate problems with the motor belt or bearings that can be easily addressed by a service team. On the other hand, a burning smell is likely indicative of an overheating motor, a problem that needs immediate attention to prevent further damage and inefficiency. A blower fan that works harder than it should due to a motor issue will consume more energy and will increase your utility bills.

If the blower motor fails, your entire climate system will stop working. If this is the case, turn off your system and look for any fuses in your electrical panel to make sure they have not been tripped. Then, check that the power switch for the blower motor is on and that it is receiving the right voltage. If it still does not start, it is time to call in a professional HVAC technician to replace the blower motor.

In many cases, the blower motor is not completely dead, but only requires replacement parts to work properly. For example, if the blower motor resistor or fan are not functioning correctly, the blower motor will not be able to respond to a demand for more or less air. This can lead to overheating and premature failure of the unit. Fortunately, replacing these parts is relatively simple for a professional technician to do and can save you hundreds or even thousands of dollars in potential repair costs and energy expenses. In addition, if your system is under warranty coverage, you’ll only pay for the cost of labor to install the new blower motor.

Control Board

The control board is an integral part of the air conditioning system, ensuring that all components function together seamlessly and efficiently. It sends signals to the other components in the system, regulating indoor temperatures and directing the operation of the compressor unit. If the control board is faulty, it can lead to inconsistent cooling or even overheating. It can also cause erratic behavior such as sudden power surges or shut-downs. Fortunately, there are steps you can take to identify and address problems with the circuit board before they become more serious.

First and foremost, make sure to turn off all power sources at the main breaker box before you begin working. This will prevent any accidental electrical shocks or injuries. It’s also important to have adequate lighting and a clean workspace to avoid introducing any dust or debris into the system. If possible, use a multimeter to test each of the connections on the PCB for proper voltage levels. Also, be sure to check capacitors for swelling or leaks; these are common signs of faulty wiring. If the connections on the PCB look dark or discolored, they may need reflow soldering.

A faulty control board can also interfere with the fan speed setting on the evaporator and condenser fans, causing them to run at inefficient speeds or even stop running altogether. This is because the control board has been sending out inconsistent PWM signals to these fans. This can be resolved by removing the faulty power resistors from the circuit board and replacing them with new ones.

As an added bonus, repairing the circuit board is usually much cheaper than replacing the entire AC. Moreover, it also helps reduce electronic waste and promotes more sustainable energy management. Therefore, opting for repair is a smart choice if your HVAC system is relatively new and the problem is minor. If you’re debating between repair and replacement, understanding when repair is the best option can help you make a more informed decision.

Uncategorized

Different Types of Pest Control

Pests are organisms that disturb or spoil human activities by eating, damaging, or destroying property or transmitting disease in homes and urban environments. Pest control aims to manage them by exclusion, quarantine, repulsion, or pesticides. Click https://seasidepest.ca/ to learn more.

Remove clutter that provides hiding places for pests. Keep food and cooking utensils in sealed containers. Clean garbage regularly and fix leaky pipes.

Chemicals are a common method used in pest control, but they can negatively impact the environment and human health if not used correctly. Pesticides are used in agriculture to protect crops from diseases and ensure a reliable food supply, as well as in public health to stop diseases such as malaria and Zika transmitted by mosquitoes. They are also used in residential settings to reduce pests that can damage homes and compromise comfort, such as cockroaches and ants.

Many different chemicals are available in the pest control industry, and each has its pros and cons. Some are derived from plants and are easier on the environment, while others have more acute effects on pests. They are grouped using schedules that limit how often and where they can be used, and they are often combined to create hybrid chemicals with enhanced effectiveness against specific pests.

There are a number of important considerations when choosing the correct pesticide, including its toxicity level and how it is administered. For example, fipronyl belongs to the phenylpyrazole family and is effective against a wide range of insects, including termites. It works by attacking the nervous system of insects, paralysing them before they die, and it is generally safe for humans as long as it is not inhaled or ingested. Other chemicals, such as hydramethylnon, are more slowly acting and target insect larvae.

Gases

The pesticide fumigants are a group of gases that penetrate into grain or other stored products and kill the insects hidden inside. This is a very effective treatment because it gets into all the nooks and crannies of containers, sacks or bulk grains as well as the smallest cracks and crevices. Fumigants also have a very long persistence in the treated space, lasting for months.

The most common fumigant used in vertebrate pest control is aluminum phosphide, an extremely toxic gas that acts in the body to prevent oxygen uptake through the respiratory tract and thus kills the insect. It is available in tablet form and ignitable gas cartridges which trained fumigation operators use. It is not only the most effective of the currently approved fumigants, it is also one of the safest in terms of occupational safety and environmental protection. Fumigation is therefore a highly professional operation, and it is very important to adhere to the detailed instructions given in product documentation for its use.

Much whole store fumigation in the past has been done in buildings not designed specifically for this purpose, and it seems reasonable to assume that this practice encouraged development of insects resistant to phosphine. However, new investigational programmes have shown that purpose-built storage buildings do retain the fumigant effectively. Inert gases such as nitrogen (N2), carbon dioxide (CO2) and helium can also be used at elevated concentrations to disinfest stored product. Technologies involving modified atmospheres that are depleted of oxygen or have elevated levels of other gases can also be effective at reduced cost and do not cause resistance to develop in insects.

Traps

Traps are useful to capture a variety of pest insects in or on the crop. Generally, traps should be placed away from areas where people frequent to prevent accidental exposure. Traps should also be placed well above the ground, at least 4 to 5 feet. This will ensure that pests cannot be spotted by people below, and it will also minimize the impact on the surrounding ecosystem.

Sticky glue traps capture insects as they pass by and are attracted to the sticky surface, but are unable to escape. This type of trap works best for capturing flies, thrips, caterpillars, and other larvae. It is important to note that this type of trap does not capture immature stages, and it should always be used in conjunction with visual inspection of plants for damage and pest feeding stages.

A simple and inexpensive way to monitor foliar-feeding insects is to use an old soda bottle, cut a window in it, and fill with soapy water or liquid hand sanitizer. This can be particularly effective in catching aphids.

Ethyl alcohol is another simple and effective way to monitor ambrosia beetles in trees. It can be dispensed through a small hole in the side of the trap. Number each trap and record its location in your growing area. It is best to check and change the traps regularly, usually weekly.

Biological Control

Biological control involves the use of living organisms to reduce pest populations. These may be parasites, predators, or disease organisms. They are introduced to the environment in such a way as to limit their negative impact on other native organisms and other crop plants. The goal is to establish a population that will effectively control the pests without adverse impacts on humans or the environment.

Generally, these organisms are released after they have been thoroughly tested for potential harmful effects on nontarget species. Their introduction is carefully planned, with attention to the needs of the enemy and pest, and careful consideration of their interaction with each other.

This type of control may be used in conjunction with other types of control. An example is the use of nematodes to manage weeds and other soil insects. These microscopic worms feed by injecting their prey with toxic bacteria that break down the insect. A wide range of species is available, including nematodes that target grubs, fleas, and ants.

Some chemical controls are also useful in combination with biological control. These include fungicides, such as carbaryl (e.g., Sevin), that can kill weeds and parasites, and the bactericide spinosad, which is toxic to caterpillars and other leaf-feeding caterpillars.

Pest control is most successful when it is integrated into an overall management strategy. In this approach, prevention is the primary objective, with monitoring and treatment used only when necessary according to established guidelines and using only approved materials. This includes cultural practices, habitat manipulation, and judicious (selective, timed) application of chemicals.

Prevention

Prevention is the best way to reduce pest problems. It involves inspecting the property, identifying the pest, and understanding its biology. Then, you can determine if the problem is worth controlling and which control methods to use.

A good preventive program includes monitoring to identify pests and their damage and removing the conditions that favor them. This can include adjusting irrigation practices to avoid excess watering (which may promote root disease), keeping compost piles away from the house, and reducing clutter where pests hide.

Preventive pest controls are usually less expensive and more environmentally friendly than eradication or suppression. Using the right repellant can be as effective as chemical sprays and may not harm pets or people. Many of these products mimic the scents of spices or predators, so they’re also appealing to humans.

Preventive measures can be as simple as sealing a crack or caulking a hole. Clutter should be removed, garbage disposed of regularly and outdoor trash cans kept closed. Regular inspections should be performed inside and outside to check for gaps, loose siding or cracks that could allow entry. It’s also important to keep landscape trees and shrubs properly trimmed, not to overcrowd them or allow them to touch structures. This allows proper air circulation and helps prevent moisture buildup that can attract pests.

Suppression

There are times when the damage a pest causes makes it necessary to control it. The level of damage determines action thresholds, which can guide control methods that are environmentally conscious and economical.

The best way to prevent a pest from damaging crops is to keep its numbers below harmful levels using natural means. This can include weeding, utilizing tolerant and resistant varieties of plants or animals, and changing growing practices to reduce conditions favorable to the pest.

Biological control is the use of naturally occurring predators, parasitoids, or pathogens to reduce pest populations. These organisms often do not kill the pests they attack but, rather, make the pests less able to survive, grow or reproduce. Examples of useful biological controls include entomogenous (entomopathogenic) nematodes, which are multicellular roundworms that act as predators of some insect pests. See Extension Fact Sheet EEP-7670 for details on the detection, conservation and augmentation of these organisms.

Other biological control methods include the use of plant-parasitic nematodes, which are bacteria associated with fungi that infect and kill insects. Similarly, entomopathogenic nematodes and their associated fungal partners infect and destroy some plant diseases. In addition, certain natural habitats may provide natural enemies that suppress pests in crop fields. For example, in sun-grown Brazilian coffee agroecosystems, the abundance of ant species that are predators of aphids increased with the proximity of fields to forest fragments, and herbivorous beetle suppression in irrigated rice fields was positively related to the number of hedgerows connected to woodlands.

Uncategorized

Term Life Insurance

Life Insurance Anderson SC can ease your family’s financial burden when you die. Your beneficiaries receive a payout called a death benefit that can be used for anything they choose.

You can select the type of life insurance you need based on your current and future needs. Factors include your health, lifestyle, and other factors.

The death of a loved one can have a dramatic financial impact on survivors, often straining already tight budgets. Choosing the right life insurance policy to help protect family members’ futures can make all the difference.

The basic purpose of life insurance is to provide a lump sum of money that will pay your chosen beneficiaries (typically spouse, children, or other relatives) if you die. Depending on the amount and your needs, this may cover expenses such as funeral costs, debt, or college tuition.

Term life insurance is typically less expensive than whole-life coverage, and it offers death benefits for a set period, such as 10, 20, or 30 years. It can be a good choice for fiscally-minded individuals who want to lock in low rates while they are still young and healthy.

A key factor in determining cost is the insurance company’s ability to assess and underwrite your risk. This typically involves a medical exam and questions about your occupation, lifestyle and other factors. Certain hobbies, such as scuba diving, may be deemed to be risky to your health and could raise your rates.

Some life insurance companies allow you to include your first premium payment with your application, giving you temporary coverage while your application is being processed – this is called “accelerated underwriting” and can be helpful for people with poor health.

When choosing a life insurance policy, look for the company with a high rating of financial strength. You want to be confident the company will be around when you need a payout years or decades down the road. A Primerica representative can explain the ratings and help you choose the right policy for your unique circumstances.

Whole Life Insurance

Whole life insurance provides permanent coverage with a fixed premium and death benefit. It also includes a savings component that builds tax-deferred cash value over the life of the policy. This money can be withdrawn or borrowed in a time of need. However, if the amount withdrawn exceeds the total death benefit or is not repaid, it may reduce the death benefit that beneficiaries receive.

The cash value portion of a whole life insurance policy accrues interest on a tax-deferred basis, similar to an investment account like a 401(k) or IRA. The rate of growth depends on the particular policy, but typically a portion of each premium payment is applied to building the cash value. This allows the policy to be self-sustainable. This is an attractive option for people who want the protection of a permanent life insurance policy and have an ongoing financial need to cover final expenses.

Whole life policies are typically more expensive than other types of permanent life insurance policies. For this reason, it is important to carefully consider your needs and understand how this type of policy fits into your overall financial plan. A qualified financial professional can help you develop a strategy to meet your specific goals and objectives.

Some whole life policies allow you to front load the initial premium for a limited period of years, such as 10 or 20. This reduces the premium to be paid each year over the life of the policy, but the premium will increase significantly upon expiration.

Whether or not you choose to add whole life insurance to your financial plans, it is critical to ensure you get a quality product from a company with strong financial strength ratings. There are a number of reliable independent sources that can provide financial strength ratings for companies, such as A.M. Best, Moody’s, Standard & Poor’s and Fitch. Adding life insurance is one of the most significant financial purchases you can make. It is essential to discuss your options with a qualified financial professional who can recommend solutions that fit your unique situation.

Universal Life Insurance

A universal life policy, also called a cash value insurance policy, offers some of the benefits of whole life coverage but is more flexible. It’s also often less expensive. Unlike whole life policies, which have fixed premiums and death benefit amounts, a universal policy allows you to increase or decrease your premium payments within certain limits set by the insurer. This flexibility helps to make it more affordable for those with variable incomes. The death benefit of a universal policy is paid to your beneficiaries tax-free, and it can be used to cover the loss of income due to a divorce or illness, pay off a mortgage or other debt, and provide for funeral costs.

Some versions of universal life insurance offer a guaranteed interest rate, which will help to ensure that your accumulated funds don’t lose value over time. However, these policies typically have higher premiums than other types of universal life insurance.

Other variations of a universal life insurance policy allow you to invest your accumulated funds into market-based investments. These investments can potentially earn a greater return than traditional whole life insurance policies, and in turn, they can lower your premiums. These policies are sometimes called indexed universal life insurance.

If you’re interested in a universal life insurance policy, talk to your financial professional about the different types of this type of coverage. They can help you determine which one is right for you based on your unique needs and situation.

Regardless of the type of universal life insurance policy you choose, it’s important to be aware that making withdrawals or taking out a policy loan from your accumulated funds could deplete your cash value and possibly cause your policy to lapse unless you add extra premium payments. Also, because this type of policy is based on market-based investments, it requires more active management than other life insurance policies.

In recent years, some universal life insurance policies have lapsed due to the inability of the cash value component to keep pace with the rising cost of the life insurance. In order to avoid this, some companies now offer no-lapse guarantees in their universal life insurance policies.

Variable Life Insurance

Variable life insurance is a form of permanent life insurance that combines a death benefit with an investment account. It consists of separate accounts that contain various instruments and investment funds, which means it’s considered a securities contract and therefore has some investment risks. As a result, it can be more expensive than other types of life insurance, like term life.

The death benefit of a variable life policy varies, depending on how the separate accounts perform. However, the death benefit is usually guaranteed to be at least equal to your premium payments and the cash value of the policy. It can also be higher than the face amount of the policy.

While the investment component of a variable life policy gives it a more permanent structure than other forms of life insurance, it comes with its own set of fees and expenses. Sales and surrender charges are applied when you buy or sell a policy, and administration fees cover essential policy activities. Loan interest and mortality risk fees are also charged, but these are less significant than other charges such as transaction fees.

With a variable life policy, you have the option to invest your cash value in various asset options, such as mutual funds. The value of your account depends on the performance of these investments and how much you pay in fees and other costs. You may also have the option to put some of your cash into a fixed account that earns a steady rate of interest and helps reduce investment risk.

Another issue with a variable life policy is the fact that its gains are taxed on a regular basis, rather than the more favorable capital gains rates. Likewise, if you borrow against your cash value, you’ll be subject to federal income taxes on the amount you take out.

It’s important to understand these differences and consider the alternatives to a variable life policy before making a decision. For example, term life policies are often sufficient when it comes to supporting your family’s financial needs for a specific period of time, and you could invest the remainder of your savings in an investment account that would provide greater growth potential than a whole life or variable universal life policy.

Plumbing

Plumbers: Fixing Dripping Faucets

Plumbers Sarasota install, repair, and maintain pipes that carry water, waste, and gases throughout homes and businesses. They read blueprints and building codes to plan pipe layouts and systems, and they use specialized tools to inspect and troubleshoot plumbing problems.

Plumbers

Plumbers must have excellent listening skills to understand their clients’ issues and determine how best to fix them. They also need to be comfortable working with their hands and in confined spaces.

One of the most common issues that plumbers deal with is fixing dripping faucets. This is a major nuisance for homeowners, as it wastes water and money and can lead to further problems with pipes and other fixtures in the home. Fortunately, most dripping faucets can be fixed with simple tools and supplies that are available at any hardware store. In some cases, however, the problem may be more serious and require the expertise of a professional plumber.

The first step in fixing a leaky faucet is to turn off the water supply valve. This is usually located under the sink or near the wall where the faucet is leaking. It is important to shut off the water before starting work on a faucet because it will prevent any accidental flooding while you are working.

Once the water is turned off, the next step is to remove the faucet handles and packing nut. You may need to use a screwdriver or Allen wrench to loosen the handle screws. Once the handles are removed, you can access the packing nut and stem. It is important to clean these parts as you go, as they will often collect water sediments that can lead to further drips. A good idea is to use white vinegar, as this will help remove any buildup and leave the parts in a cleaner condition.

After removing the packing nut and stem, you will need to replace the O-ring and seat washer. This is a fairly straightforward process and should be easy to do, even for novice plumbers. The O-ring is usually a rubber material that will need to be replaced, and the seat washer is a small disk that sits on top of the valve stem. It is important to ensure that the new O-ring and seat washer are correctly installed, as a poor fit can cause leaks.

After replacing the O-ring and seat washer, it is a good idea to tighten the adjusting ring with a spanner tool that should be included in your repair kit. This will ensure that the spout is properly sealed and that no more water is escaping from the spout. Finally, you can reassemble the faucet and test it for any remaining leaks. If there are no leaks, you can turn the water back on and enjoy your newly repaired faucet!

Replacing the Seat

The valve seat, or washer, is the part that allows water to flow through the faucet. If an inspection reveals nicks or other damage to the seat, you may need to replace it. You can buy replacement seats at most plumbing supply outlets. To remove the old one, first turn off your water supply by turning the valves under your sink. Then, you’ll need a wrench with either a hexagonal or square tip to unscrew the seat. You may also be able to take the seat to a machinist to have it reground, but you’ll probably just be better off buying a new one.

Replacing the Cylinder

Generally, plumbers install and repair the pipes that supply water and gas to, or carry waste away from, homes and businesses. They may specialize in specific types of pipes, fixtures or appliances, and must be familiar with local building codes and regulations. Plumbers often work with their hands, using tools to open and close valves and to cut, bend and join pipe sections together. They also use specialized tools to detect and repair leaks, such as augers, snakes and hydro jets. Some plumbers choose to pursue professional certification, which can improve their career opportunities and earnings.

Plumbers must have strong customer service skills to interact with clients, as they may be called upon to explain complex plumbing issues and solutions. They must be able to listen carefully to the customer’s concerns and answer questions clearly and concisely. Customers often feel stressed and upset when their plumbing systems break down, so the plumber must be understanding and empathetic.

Plumbers must have a high school diploma or equivalent and undergo extensive on-the-job training through an apprenticeship program, which can last from two to five years. After completing the apprenticeship, they must pass an exam to become licensed plumbers. Licensing requirements vary by jurisdiction, but typically include passing an exam on plumbing codes and regulations. Plumbers who wish to advance in their careers can pursue additional certifications, such as becoming certified in green plumbing practices or working with particular types of equipment. Some plumbers also belong to unions, which can help them negotiate wages and benefits. Many states and cities require plumbers to complete continuing education courses to keep their licenses valid. In New York, for example, master plumbers must complete seven hours of continuing education each year to renew their licenses. This ensures that they remain current on changes to the state’s plumbing code. Those who do not take continuing education courses risk having their licenses revoked. In addition, some plumbers choose to join trade organizations, which can help them stay informed about industry trends and developments. These organizations often have online resources, blogs and podcasts that can be useful to their careers.

Replacing the Handle

Plumbers are skilled tradespeople who specialize in the installation, repair, and maintenance of plumbing systems. These systems facilitate the distribution of water, gas, and waste in residential and commercial buildings. They ensure that these systems function properly, allowing for a clean water supply, proper drainage, and safe operation of appliances like washing machines and dishwashers. Plumbers usually undergo extensive hands-on training through an apprenticeship or a trade school program before they become licensed. They are also required to adhere to specific safety protocols when working with hazardous materials or in confined spaces.

While some of the main responsibilities of a plumber involve repairing existing plumbing systems, others work on new construction projects. In this role, they follow blueprints and architectural plans to lay out piping systems, install fixtures and appliances, and connect them to water supply and drain lines. They may also use specialized equipment to inspect pipes for leaks or other issues, such as video cameras and pressure gauges.

One of the most important qualities of a plumber is their ability to solve problems. Whether they’re diagnosing a leak, unclogging a drain, or determining why a faucet is leaking, plumbers must be able to think analytically and approach each problem systematically to come up with effective solutions. This requires excellent communication skills, as plumbers often interact with customers directly to explain complex issues and receive feedback on their work.

Depending on the type of plumbing system, plumbers may need to perform routine maintenance on their tools. For example, some plumbing systems require periodic flushing to remove sediment from the pipes. Others may need to be re-plumbed or replaced entirely due to age or damage. Plumbers must keep up to date on the latest tools and technology in their field, as well as the latest building codes and regulations.

A career as a plumber can be highly rewarding for individuals who enjoy working with their hands, solving problems, and providing essential services to the community. Plumbers must complete extensive hands-on training through an apprenticeship or trade school program before they can be licensed, and they must continue to gain experience in the field to remain competitive as professionals. In addition, some cities and states require plumbers to obtain additional certifications or continuing education credits to maintain their licenses.